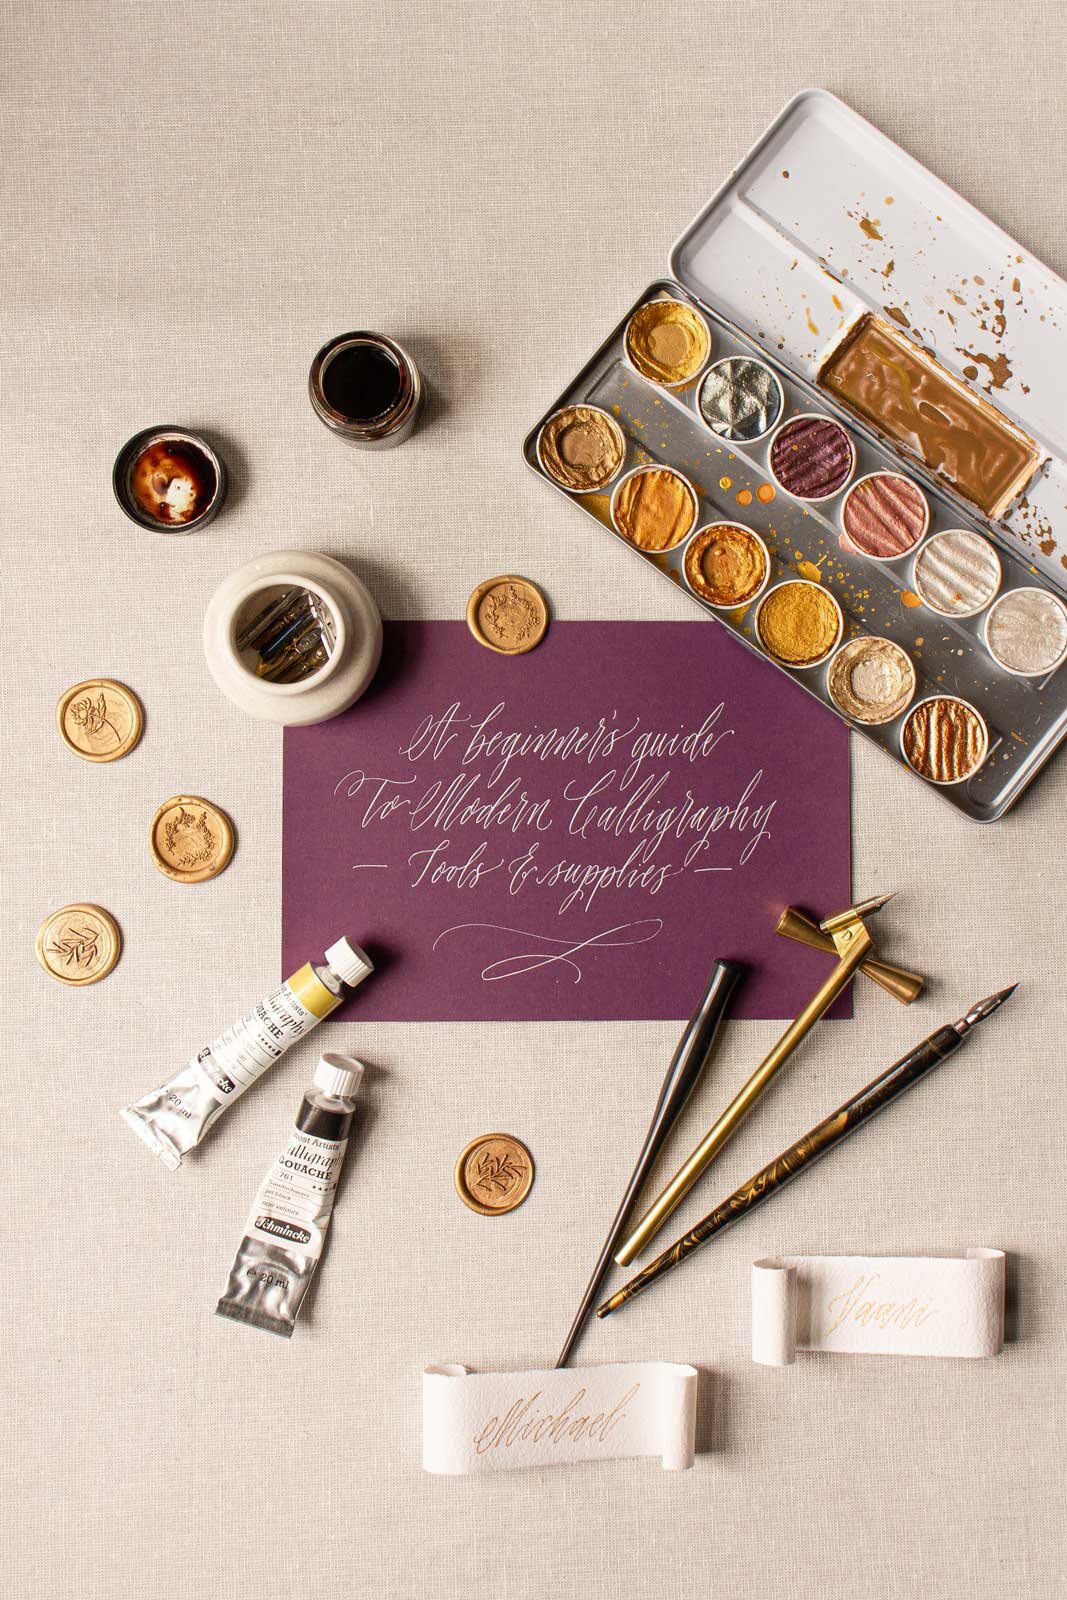
Free Calligraphy gift tags

I just love this time of the year! I have so many beautiful memories from past Christmases, especially around creative crafts with my mum and sister and gift-giving.

This year I’ve put together some new calligraphy gift tag printables that you can download and use for your gifts by clicking the link at the end of this post. They’re created with a nib and ink and some added star details.

I also love making my own wrapping paper with calligraphy, this year I’ve gone for gold on white but I also adore using brown paper. I have a tutorial on how to create your own calligraphy wrapping paper and ribbons here if you are interested in making your own.

Have the most wonderful Christmas and holidays with your family and friends. Also, if you upload any photos of your gift creations with the gift tags make sure you tag me as I’d love to see them! @mathildalundin

Merry Christmas!

Mathilda x

WHAT YOU'LL NEED

  • Printable download (you’ll find this at the end of this post)

  • White (or other light) card stock of choice (I like to use something a bit heavier to add a bit of sturdiness to my tags, approximately 200 - 300gsm)

  • Computer & printer

  • PDF viewer (e.g. Adobe Reader)

  • A hole punch

  • Ribbon or twine


STEPS

  1. Download your gift tags and open up with your PDF viewer

  2. Print out the gift tags on A4 or US letter paper. I like to use a matte paper stock between 200-300 gsm and feed through the fine art front tray of my printer. Make sure to have a look at what tray and thickness is suitable for your printer and that your print quality is set to 'high'.

  3. Using scissors, a scalpel or guillotine, cut around the line on the outer edges. I like to use a scalpel and metal ruler on a cutting mat.

  4. Punch a hole in the top of the tag where the circle is, write a special note on the back and attach the gift tag to your wrapped gift with a ribbon or twine.


Related posts

Cristina and Loudon's elegant Autumnal wedding at Hengrave Hall
elegant-autumnal-fine-art-wedding-at-hengrave-hall-suffolk.jpg

I loved working on the on the day stationery items for Cristina and Loudon’s beautiful wedding at Hengrave Hall in Suffolk. The gorgeous Tudor manor house in the english countryside was the perfect wedding venue for an elegant Autumn wedding.

Amy from The Timeless Stylist was the talented stylist bringing her vision and ideas to life with a group of talented wedding suppliers to create the couple’s dream wedding. The brief incorporated a neutral background with delicate pops of colour and Autumnal details.

For the stationery I used a beautiful handmade paper with deckled edges to add texture to the designs which featured shades of burgundy and pops of gold through handmade details and botanical wax seals. I used my signature elegant bohemian calligraphy script and included Autumnal drawings of foliage and florals created with a traditional nib and ink. Amy then styled these beautifully agains textural elements like burgundy velvet for the table plan and golden frames for the signage.

The couple had fallen in love with one of my calligraphy ceremony banners so I was delighted to calligraph one of their favourite parts from A Picture of Dorian Grey onto a fabric banner. Which was framed by Moss & Stone Floral Design a beautiful floral design by and acted as the backdrop as the couple said their I do’s.

The wonderful team of wedding suppliers:

Design & Styling: The Timeless Stylist
Photography: Helen Warner Photography
Floral Design: Moss & Stone Floral Design
Styling Assistant: By Siobhan Louise
Styling Assistant: Pearline Events
Stationery & calligraphy: Mathilda Lundin Calligraphy
Napkins & Ribbons: The Natural Dyeworks
Tablecloths: 88 Events Company 
Dessert Table: Egg and Moos
Tableware & Props: The Timeless Stylist
Venue: Hengrave Hall

Related posts

A beginner's guide to modern calligraphy: My top tools and supplies
 
mathilda-lundin-modern-calligraphy-tools-and-supplies-for-beginners.jpg
 

If you would love to start creating beautiful calligraphy with a pointed nib and ink but feel unsure which tools you need to get started, then this is the post for you. When I first embarked on my journey with calligraphy I remember getting quite overwhelmed with all the options for inks, nibs and penholders. I spent a lot of time and money on testing tools and figuring out which worked really well for me and my practice. So I wanted to put together a post with the tools I think are great for calligraphy beginners. Plus a few extras, because who doesn’t love a beautiful sparkling gold ink!

The essential kit

There’s so many beautiful calligraphy tools out there. But there’s only a few that are essential to start your practice. A nib, a penholder, an ink, paper and guide sheets.

Nibs

There’s lots of nibs out there and you’ll probably find you like some more than others. It really depends on your technique and I favour different ones for different materials and styles. But for beginners there’s two that I think are absolutely brilliant.

Nikko G – https://scribblers.co.uk/product/nikko-g-nib/?ref=9 *
This is a Japanese nib that is quite sturdy, making it great for when you start out and are getting a hang of the technique and different angels.

Brause 361 –  https://scribblers.co.uk/product/brause-361-steno-nib/?ref=9 *
Also known as the Blue Pumpkin this nib is more flexible than the Nikko G. Which will give you thicker downstrokes with less pressure and is great fun to play around with and compare to the Nikko G. I like to use it on rougher textures.

Pen holders

There’s two main types of pen holders that you will see, straight holders and oblique holders. I recommend beginners to start with a straight penholder. It’s just a bit more straightforward as it looks more like a “normal pen” and will give you one less angle to think about. Oblique holders are fantastic if you like your script to have a slant. But some people find them a bit tricky to get the hang of initially. Which is why I recommend the straight holder to start, and to then move on to an oblique holder when you’ve got a hang of the technique.

You might find that you like both for different styles while others find they have a clear preference. I also find that a lot of the left handed calligraphers I’ve taught prefer to use a straight pen holder for both straighter and more slanted scripts.


Straight holders

Speedball pen holder –  https://scribblers.co.uk/product/speedball-penholder/?ref=9 *
A great budget friendly option.

Cork tip pen holder – https://scribblers.co.uk/product/cork-tip-penholder/?ref=9 *
If you do a lot of calligraphy I find myself reaching for a holder made out of wood or with a cork tip like this one. For me it sits better in my hand and keeps me comfortable writing for longer.


Oblique holders

Oblique pen holder with a metal flange – https://scribblers.co.uk/product/plastic-oblique-pen-holder-with-metal-flange/?ref=9 *
For oblique holders I recommend using one with a metal flange. Because it’s made out of metal you can adjust the flange for your nib to fit properly, making for smoother writing. The downside to this is that if you’re left handed you need to get one that is made to be used for left handed calligraphers so make sure to check that before you buy one.

Speedball oblique pen holder – https://scribblers.co.uk/product/oblique-penholder/?ref=9 *
A great budget friendly option that works for both right and left handed calligraphers.

Ornamental wooden oblique pen holder – https://scribblers.co.uk/product/ornamental-wooden-oblique-holder-with-metal-flange/?ref=9 *
As with the straight holders I tend to use one that is made out of wood as I find it more comfortable.
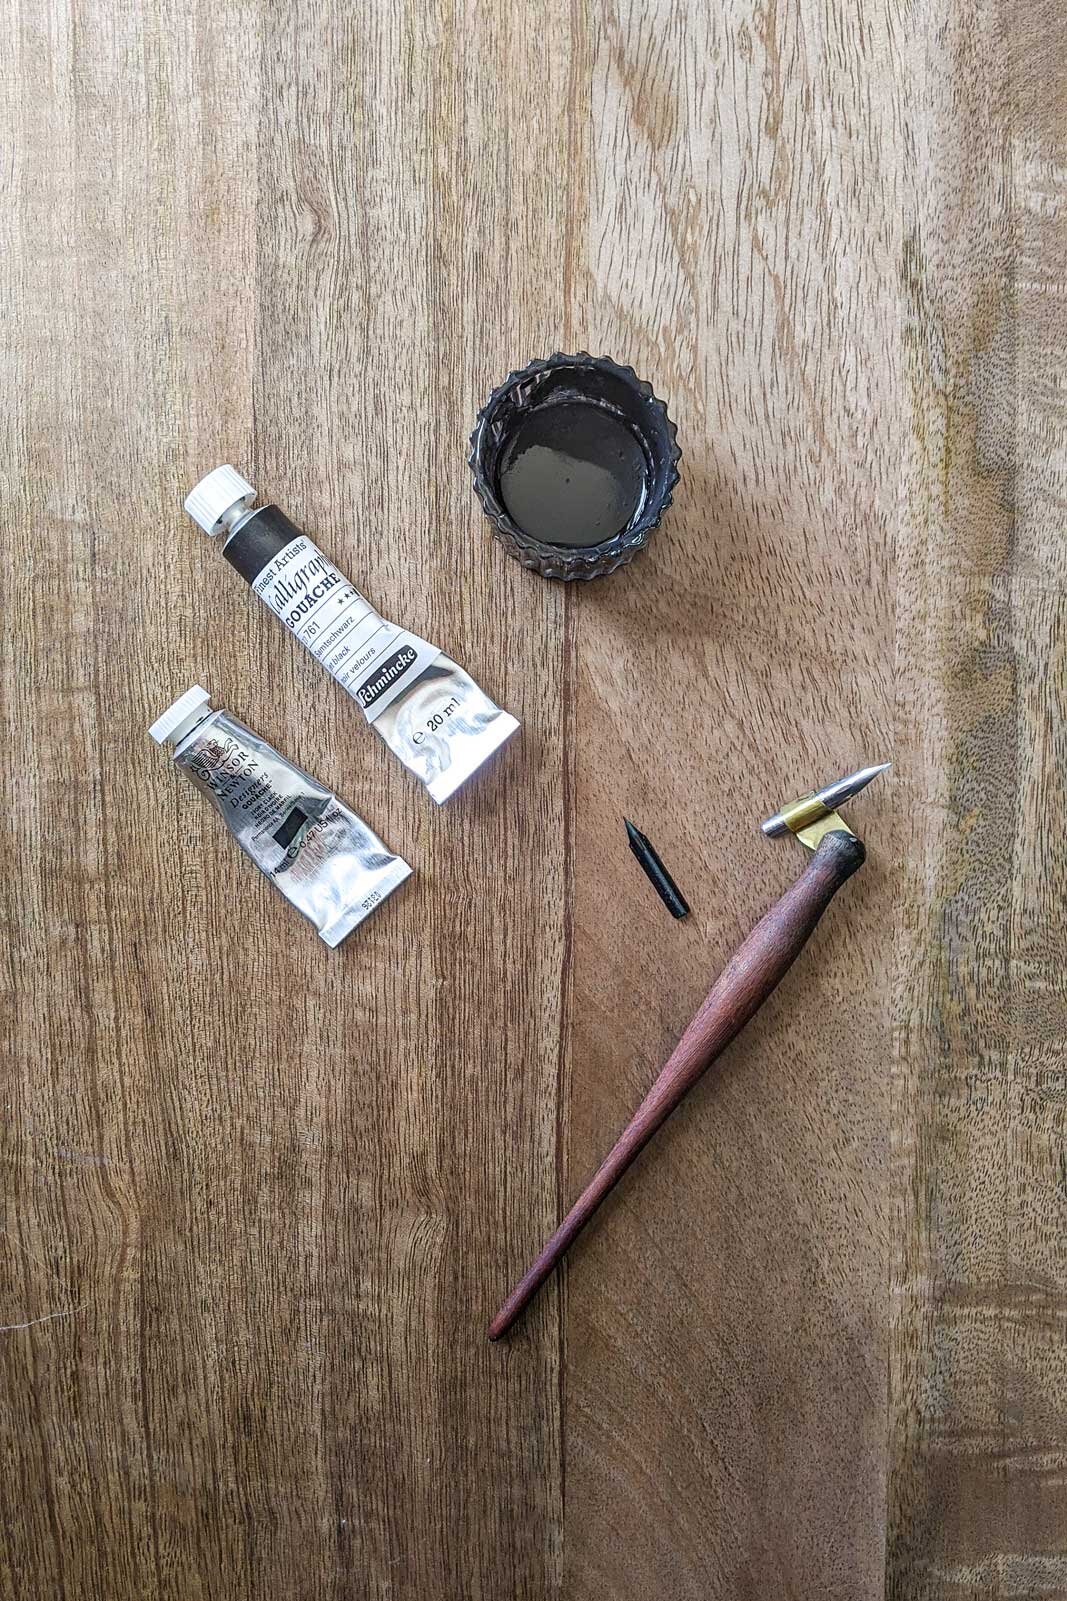
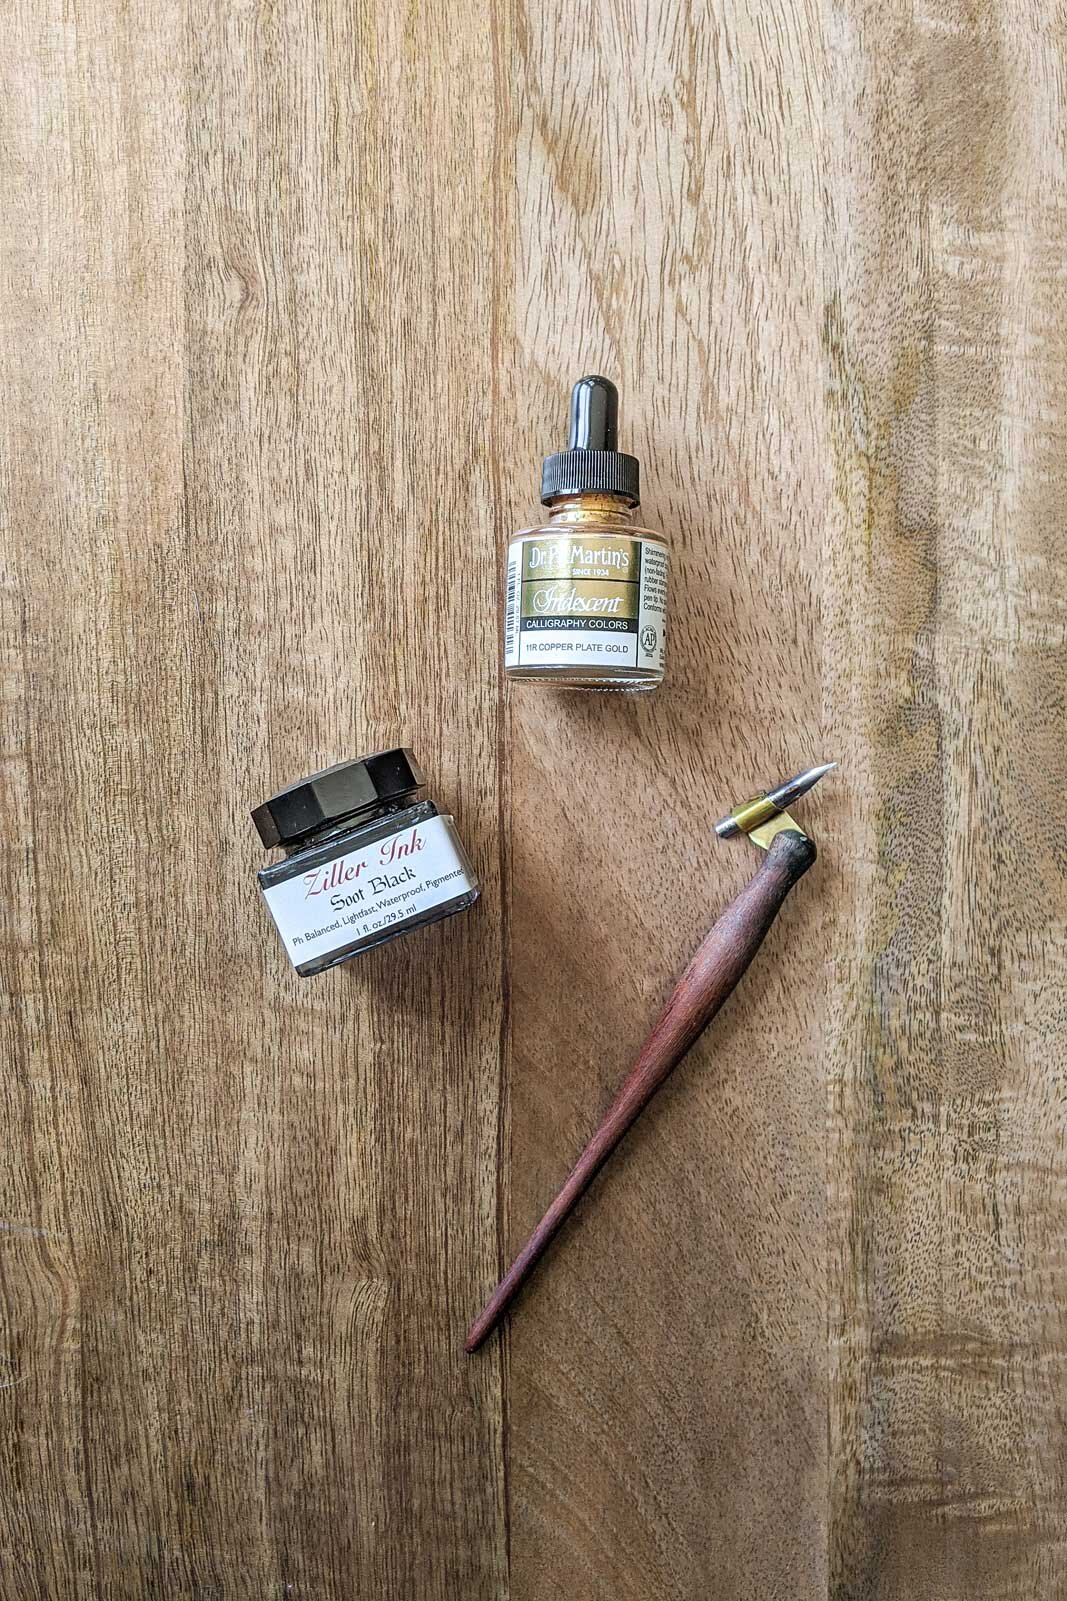
Inks

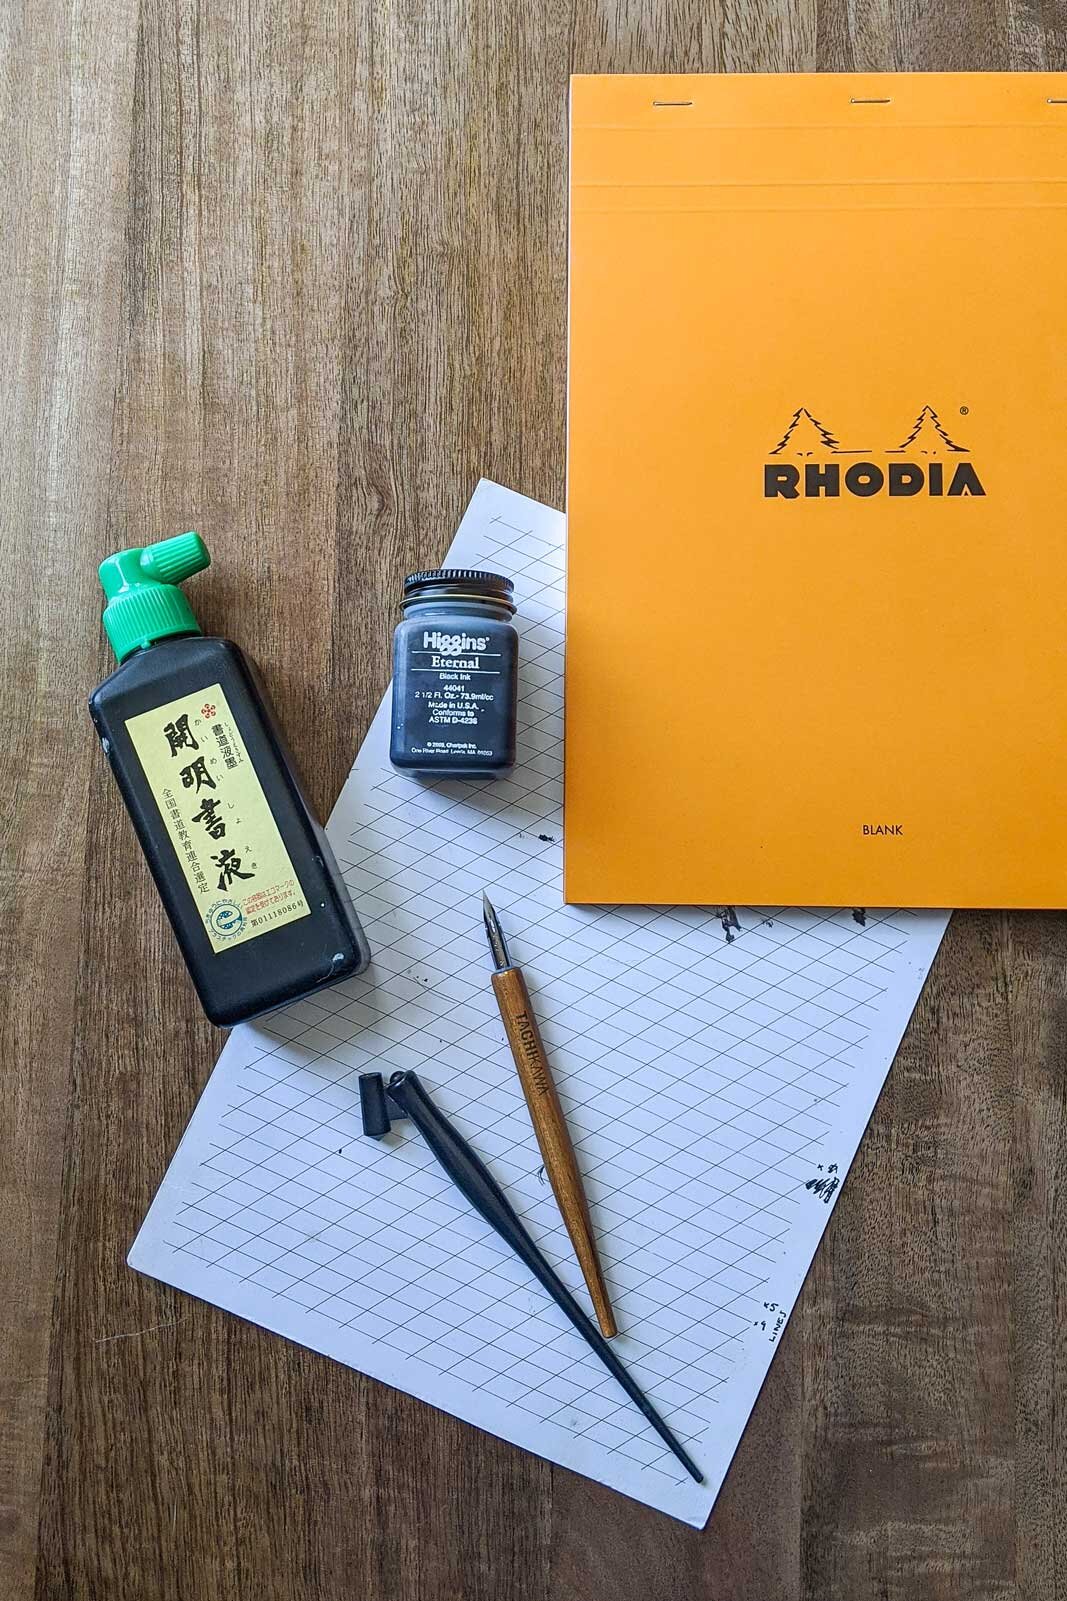
Higgins Eternal Ink – https://scribblers.co.uk/product/higgins-eternal-ink-74ml/?ref=9 *
A very popular ink here in the UK. It’s lovely a smooth to write with and quite thin which helps with creating fine hairlines (upstrokes). I do find it can bleed on some papers though so make sure to test it before you start a new project.

Sumi Ink – https://scribblers.co.uk/product/kuretake-sumi-ink-60ml/?ref=9 * or https://www.amazon.co.uk/Moon-Palace-Sumi-Ink-180/dp/B001C70A8W/ref=asc_df_B001C70A8W/?tag=googshopuk-21&linkCode=df0&hvadid=309883060481&hvpos=&hvnetw=g&hvrand=2795338490023970195&hvpone=&hvptwo=&hvqmt=&hvdev=c&hvdvcmdl=&hvlocint=&hvlocphy=9045891&hvtargid=pla-393429025383&psc=1
A lovely ink that I find flows smoothly, dries darker than the Higgins Eternal ink and works on most papers I’ve used. Some sumi inks (like the Kuretake linked above) are also waterproof which is great for envelopes.
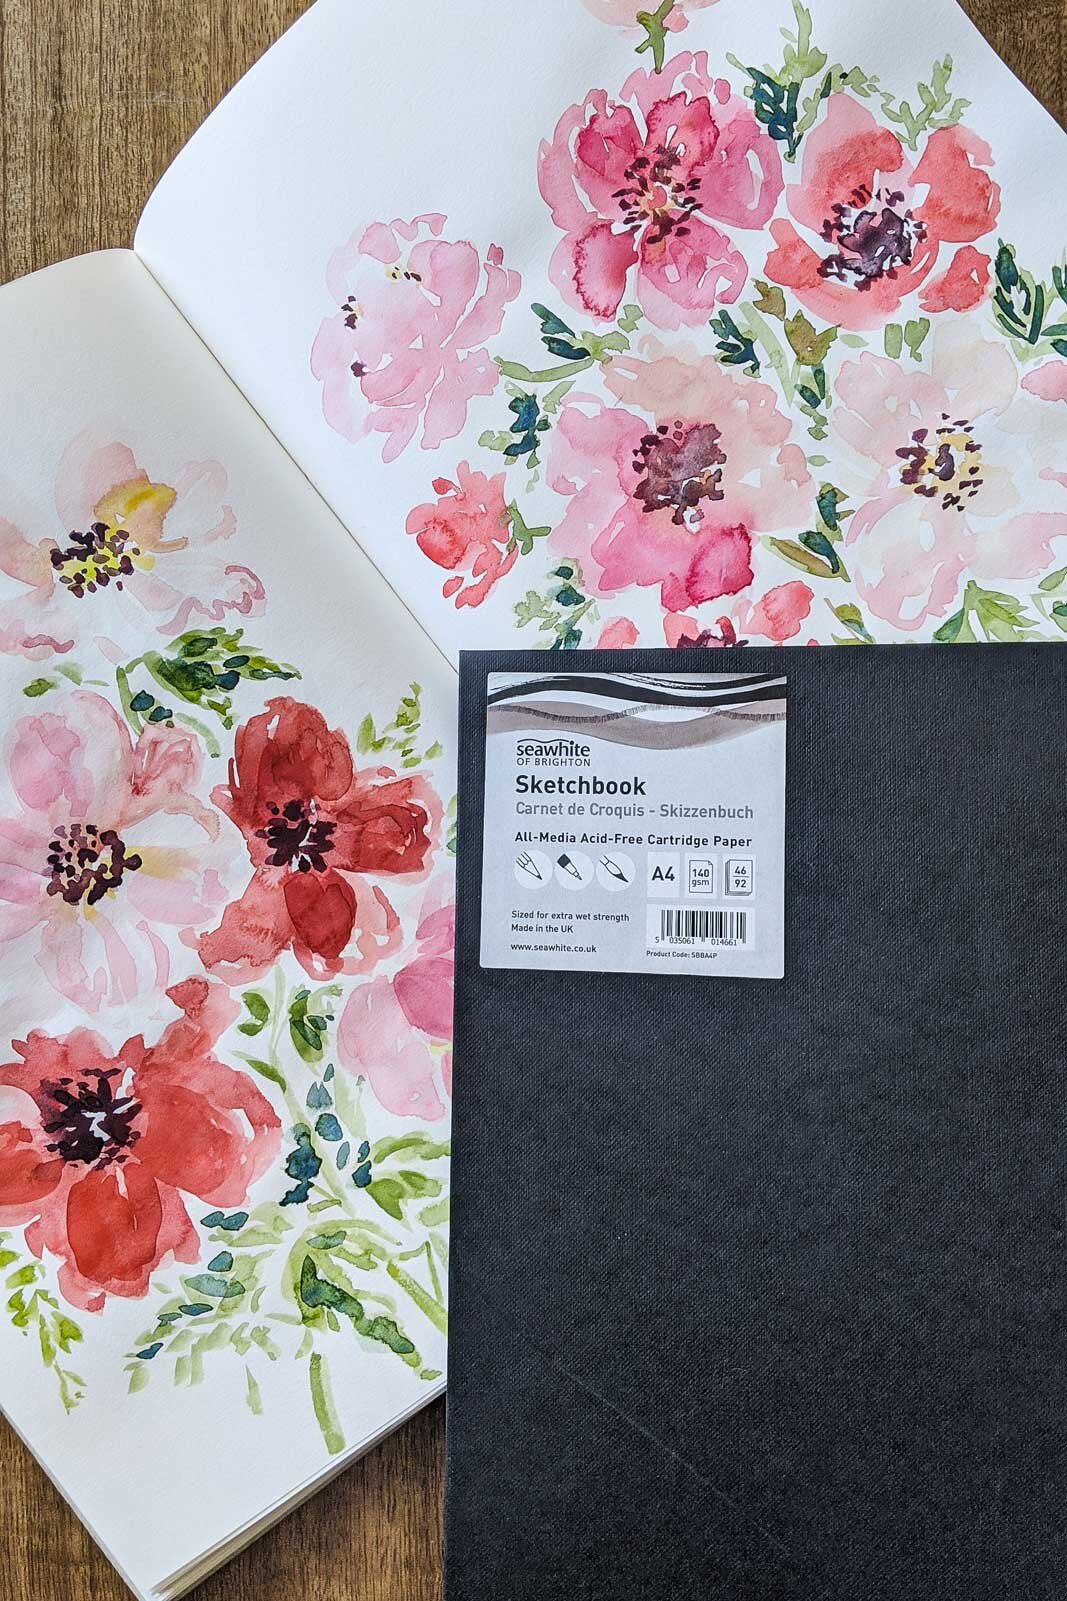
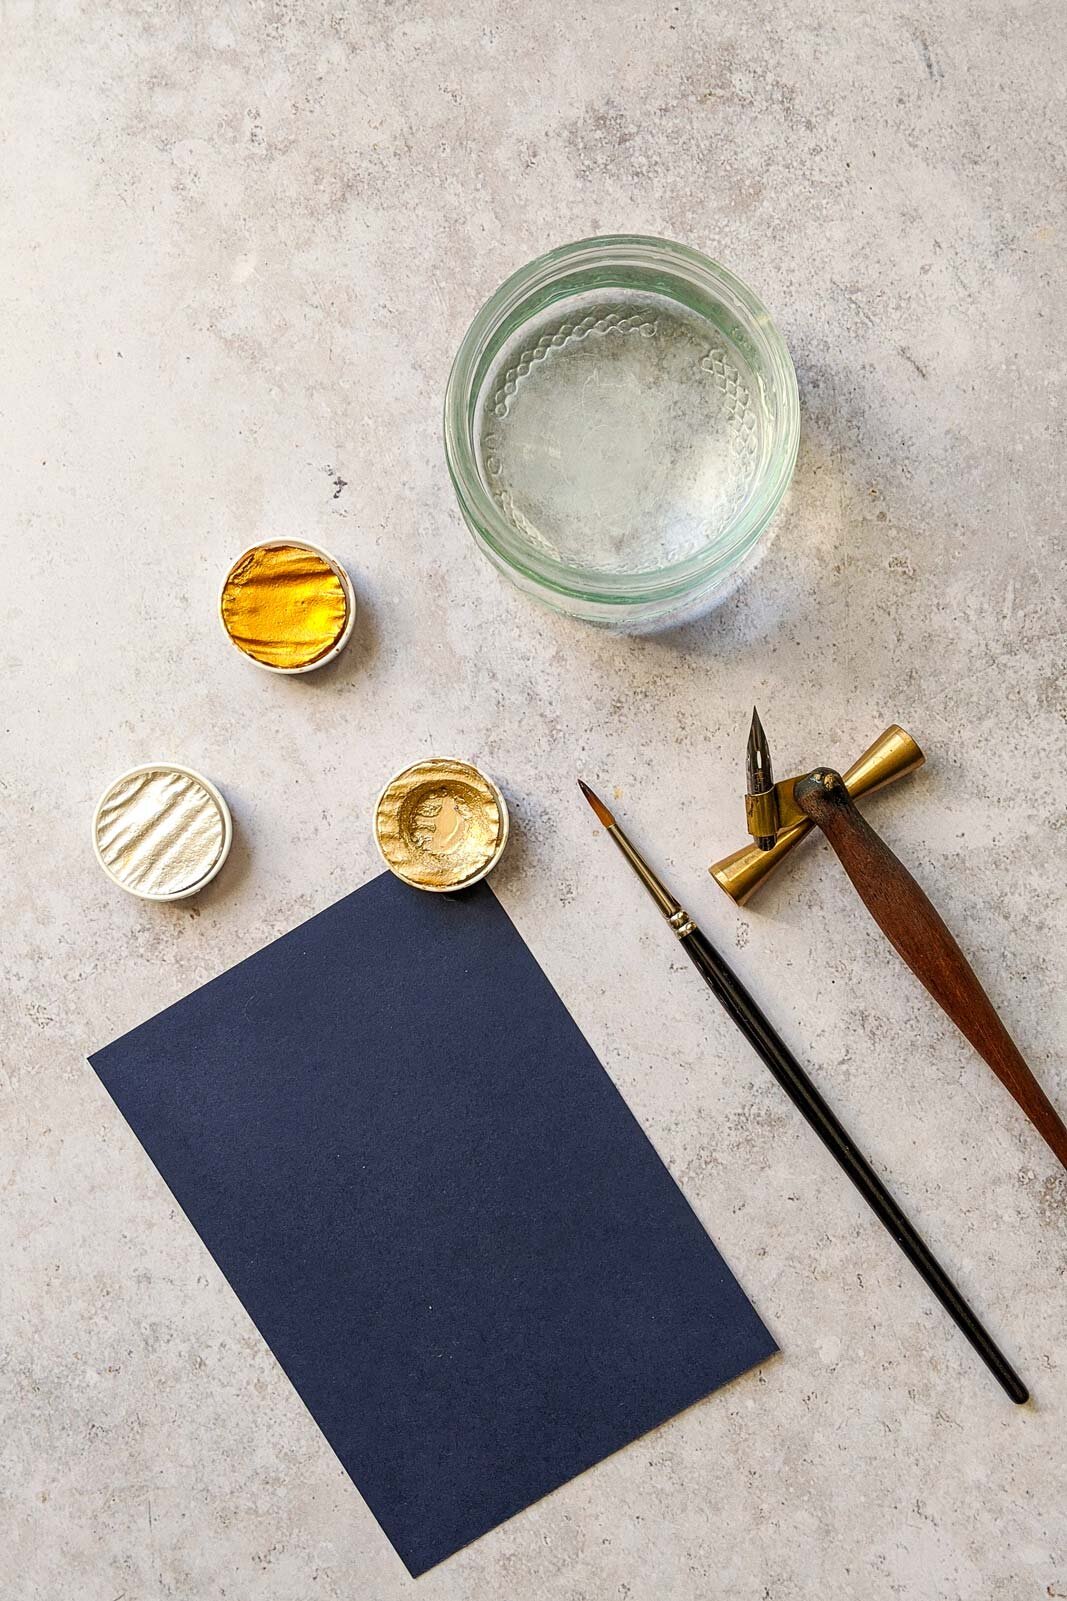
Paper

Rhodia pad (plain) – https://scribblers.co.uk/product/rhodia-head-stapled-pad-a4-plain/?ref=9 *
A gorgeously smooth paper that I love for practice and calligraphy that I scan in for invitations. It’s transparent enough that I can slip a guide sheet underneath for easy practice.

Rhodia pad (dotted) – https://scribblers.co.uk/product/rhodia-head-stapled-pad-a4-plain/?ref=9 *
As lovely as the paper above but with a dot grid. Great if you want to work straight on the paper and not have to worry about using a guide underneath the paper.

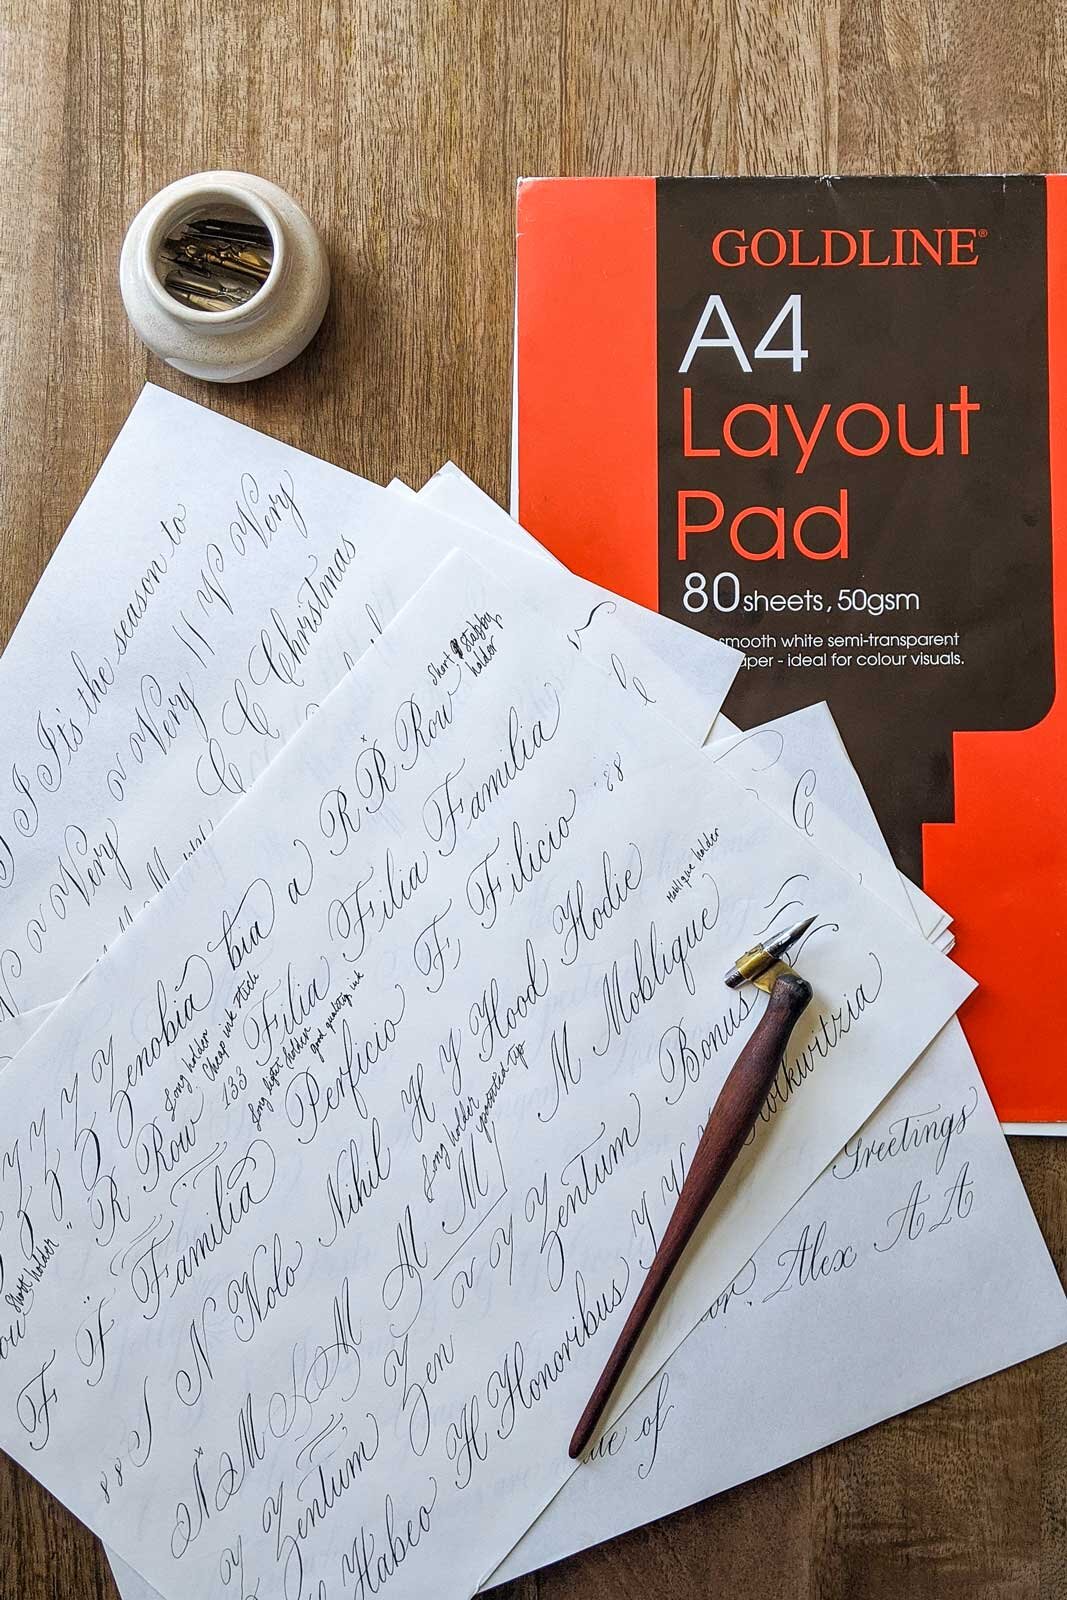
Layout paper – https://scribblers.co.uk/product/goldline-a4-layout-paper/?ref=9 *
Great for both practice and to create a design as you can easily layer the paper on top of another sheet and refine your design. I like the Goldline layout pad as I find the weight enough to work with the inks I use without bleeding.

Printer paper – https://www.amazon.co.uk/gp/product/B000H80CXA/ref=ppx_yo_dt_b_search_asin_title?ie=UTF8&psc=1
Printer paper can be great, especially if you like printing your guides and working on top of them. Some printer papers will not be good enough quality to work but I’ve found that this HP Color Choice Laser Paper works great with ink and nibs for me.

Online courses, guidesheets and guidelines

Modern Calligraphy for beginners - Online course
Learn the beautiful art of calligraphy with my online course. Aimed at complete beginners and beyond you will learn how to set up your tools correctly, how to create basic strokes, letters, beautiful words and more. I will also take you through my process of creating a calligraphy artwork so you can create a stunning piece of calligraphy art for your own wall or to create a wonderfully personal gift for someone.

Modern Calligraphy Beginner’s Guide - Digital Worksheets
A 12 page downloadable guide designed to take you from your first calligraphy strokes through to creating beautiful words. Perfect to download and get started straight away!

IAMPETH have a couple of different guidelines for different styles available to download here: https://www.iampeth.com/collection/guide-sheets

Scribblers have a guideline generator with adjustable size toggles: https://scribblers.co.uk/guideline-generator/

Metallics, white and waterproof ink

If you tire of black ink and want to spice up your practice! Or for all those beautiful projects you have in mind.

Metallic ink

Finetec (Coliro) metallic paints – https://scribblers.co.uk/product/finetec-watercolour-6-pearl-colour-set-m600/?ref=9
My absolute favourite paints for metallics. They have so many beautiful colour and you can get them in sets. Or you can buy individual refill pans (https://scribblers.co.uk/product-category/paints/finetec-watercolours/fintec-coliro-watercolours/?ref=9 *) to create your own set. I have written a guide for how to use these paints with your pointed nib here.

White ink

Dr Ph. Martin’s Bleedproof White – https://scribblers.co.uk/product/dr-ph-martins-bleedproof-white-30ml/?ref=9 *
Beautifully opaque white that shows up really well on dark and bright coloured paper. It comes as a paste so you do need to scoop out some product and add a bit of water before you can use it but the extra effort is definitely worth it. You’re looking for a whole milk thickness consistency when mixing with water. Start with less water and test until you have a consistency that flows smoothly through your nib and is opaque on your paper.

Mixing different colours

While there’s many colourful inks out there to buy I always mix my own using gouache. This allows me to mix up about any shade I can think of and by using a good quality paint I know my ink will be of really good quality. As with the white ink you’re looking for a whole milk consistency when mixing the paint with water. Start with less water and test until you have a consistency that flows smoothly through your nib.

My favourite gouache brands for calligraphy are:

Winsor & Newton Designers Gouache

Schmincke Finest Artist's Calligraphy Gouache – https://scribblers.co.uk/product/schmincke-calligraphy-gouache-gold-pearl/?ref=9 *

Waterproof ink

In some instances it’s important that the ink doesn’t budge when it has dried on the paper. For these times I love Ziller ink for colourful shades and Dr Ph Martin's Iridescent inks for metallics.

Matte black – https://scribblers.co.uk/product/ziller-ink-soot-black-28ml-1oz/?ref=9 *

Glossy black – https://scribblers.co.uk/product/ziller-ink-glossy-black-28ml-1oz/?ref=9 *

Gold – https://scribblers.co.uk/product/dr-martins-iridescent-calligraphy-colours-copperplate-gold-30ml/?ref=9 *

Silver – https://scribblers.co.uk/product/dr-martins-iridescent-calligraphy-colours-silver-30ml/?ref=9 *

Just to note that some of the links in this blog post are affiliate links and marked with a *. I would never let this impact which tools I recommend, I’m only sharing my absolute favourites here and Scribblers is my go to shop for most of my calligraphy supplies. But using them means that, to no extra cost to you, you help me keep creating inspiring and helpful content for you like this guide.


I hope you’ve found some ideas for the tools you want to get to get started on your calligraphy journey. Remember it’s all about practice and having fun so if getting a bright magenta ink motivates you to practice that is amazing. You will find you like different tools and it’s all about experimenting and enjoying the journey.

If you have any questions, feel free to ask them in the comments. Thank you for reading and enjoy the rest of your day.

Warmly,
Mathilda

Pin for later

 
mathilda-lundin-modern-calligraphy-tools-and-supplies-for-beginners-pinterest.jpg
 

Related posts

Violette & Daniel –  Romantic wedding invitations on handmade paper for a celebration in the Cotswolds
bespoke-calligraphy-wedding-invitations-floral-wreath-illustration-handmade-paper.jpg

A bespoke wedding design featuring romantic hand drawn floral wreath illustrations and calligraphy in one of my most romantic calligraphy scripts with gentle flourishes. Printed on handmade paper with a gentle tone of peach. Paired with calligraphy addressing in gold on blush envelopes and a white floral wax seal with an added touch of gold for an extra elegant finishing detail.

Here displayed with beautiful edible wedding favour biscuits by Sugar Plum Bakes.

Related posts

An elegant autumn wedding at Wotton House, Surrey
elegant-wedding-at-wotton-house-dorking-surrey.jpg

Here’s some beautiful colourful inspiration from an autumnal wedding shoot I took part in last autumn. It was all about embracing the season at the gorgeous country estate wedding venue Wotton House in the Surrey Hills. Autumn is the season of warm rich colours and an abundance of delicious looking fruits and seeds which was incorporated throughout the wedding styling and details.

wedding-table-setting-at-historic-wedding-venue-wotton-house.jpg

Leigh designed a beautiful bouquet and floral arrangements from seasonal British grown. And Vaani brought in the flowers together with fruits to create a beautiful cascading design for the gorgeous wedding cake.

The story behind the shoot was of two lovers whose pen pal relationship, that spanned across the Atlantic ocean, grew into a deep love. I scribed these letters in two of my calligraphy styles to form the beginning of our story. The wedding suite featured an elegant script in a design that flowed across the page and was printed on luscious handmade paper. With an outer wrap with the couple’s initials encased in a floral wreath design.

wedding-calligraphy-love-letters.jpg

The colour palette featured a deep teal and yellows contrasted against shades of blush and coral. To evoke the feelings of the warmth of the autumnal sun warm metals like gold and brass were used throughout and rich velvets and ribbons were used to add a depth of texture.

Storme created an effortlessly romantic bridal look adorned with beautiful floral jewellery and hair accessories by PS With Love.

modern-calligraphy-wedding-love-letters-wax-seals-wotton-house-dorking.jpg
modern-calligraphy-wedding-love-letters-wotton-house-dorking.jpg
wedding-portraits-at-wotton-house-dorking-surrey.jpg

The amazing wedding suppliers:

Photographer (US based): Eleanor Stenner

Venue: Wotton House Hotel

Co-Planner & Cake Designer: Sugar Plum Bakes

Co-Planner & Photography Assistant: Cassandra Jackson

Creative Director & Stylist: The Timeless Stylist

Floral designer: Leigh Chappell Flowers

Stationery & Calligraphy: Mathilda Lundin Calligraphy

Hair & Make-up Artist: Storme Make up & Hair

Bridal Jewellery: PS With Love

Furniture Hire: Hire Love

Bridalwear: Morgan Davies Bridal

Suit Hire & Groom Accessories: The Vintage Suit Hire Company

Ribbons & linens: Silk and Purl

Rings: London Victorian Ring Company

Models: @sapphireoneill @lewisclark90


PIN FOR LATER

romantic-autumn-wedding-at-wotton-house-surrey-2.jpg
romantic-autumn-wedding-at-wotton-house-surrey.jpg

Related posts

Hazy Summer Vibes
bohemian-wedding-table-styling-inspiration-the-winding-house-kent.jpg

In the midst of summer I just have to share the inspiring images from this Hazy Summer Dayz wedding shoot. It was featured on Love My Dress last year and I still can’t get enough of the gorgeous colour palette. It was styled by Sama Hemsley, wedding stylist of Utterly Wow, and she was inspired by the time of year when the poppies are starting to appear.

The brief was simple, earthy, bohemian and minimalist with a modern twist and we were exploring the notion of delicate, natural beauty against a contemporary, more urban backdrop. Set at The Winding House in Kent which is a former coal mine and now is a wedding venue with a beautiful light-filled, contemporary space. The colour palette was warm and inviting with rich pinks, oranges, yellows and reds.

For the stationery I designed a minimalist typography led invitation suite in warm, gentle shades. As a finishing touch I added hand-drawn poppy motifs to go with the wedding invitation and menus and place cards. This was also drawn on the model’s wrist as a tattoo to tie together the poppy theme.

bohemian-floral-banners-the-winding-house-kent-wedding.jpg

The amazing wedding suppliers:

Concept, Planning & Design Utterly Wow Wedding Planning & Design
Photography Voyteck London Wedding Photographer
Venue The Winding House Weddings
Videography Matthewdoylephotography
Florals Iris & Co
Cake Cake Me By Surprise
Stationery & Calligraphy Mathilda Lundin Calligraphy | Hair & Make up BEYOU Weddings
Furniture & Props Hire Love
Grazing Food Grazing Social
Tableware Place settings
Models Jade  and Ryan
Bridalwear Blackburn Bridal Couture
Groomswear Slater Meanswear

Pin for later

 
bohemian-summer-wedding-inspiration-the-winding-house-kent-pin.jpg
 

Related posts

Modern wedding inspiration at Jubilee Pool in Cornwall
elegant-modern-Wedding-inspiration-at-Jubilee-Pool-Cornwall.jpg

It’s taken me way too long to share this but I just love the sophisticated feeling of this wedding shoot at Jubilee Pool. Steeped in history, the Art Deco architecture of Jubilee Pool dates from 1935, and gives a touch of glamour to the modern wedding styling. Being one of Cornwall’s iconic locations and one of the most breathtakingly beautiful Lido’s in the country, this is a magical place for a wedding.

With the sleek lines, modern details and romantic touches this has some beautiful inspiration for the modern couple. The stationery was created with an organic calligraphy style on handmade paper to bring in a bit of texture and life. With added marbled wax seals as a finishing detail, bringing in a hint of those ocean waves from the wedding venue.

The brilliant supplier team

Venue / Jubilee Pool, Penzance Cornwall | Photography / John Hersey, Holes In The World Studio | Assistant / Skye, Chasing The Light  | Stylist & planner / Rebecca Green, The Unique Cornish Event | Bridal wear / St Ives Bridal Studio | Skirt / Sassi Holford | Cami / Raspberry Pavlova | Wrap / Jesus Peiro  | Florals / Tide Flowers | Ribbon / Little Acorn Silks | Stationery / Mathilda Lundin  | Make Up / Tamsin Siddiqui | Hair / Zebrafinch | Jewellery / Forest & Fawn | Models / Beatrice Blaj + Zeb Luke Gethen 

The shoot was featured on Bride & Tonic.

Pin for later

 
elegant-modern-Wedding-dress-at-Jubilee-Pool-Cornwall-pin.jpg
 

Related posts

My favourite art supplies for floral watercolour painting
 
mathilda-lundin-art-supplies-for-floral-watercolour-painting.jpg
 

I often get questions about what art materials I use for my floral paintings, so I thought I’d list some of my favourites here. I’m a firm believer that part of finding your style is experimenting with different materials so I hope you’ll find some supplies you love here. I’ll write a bit about the tools I love in each section and link to the specific tools I’m talking about below.

Just to note that some of the links in this blog post are affiliate links. I would never let this impact which tools I recommend, I’m only sharing my absolute favourites here. But using them means that, to no extra cost to you, you help me keep creating inspiring and helpful content for you like this guide.

WATERCOLOUR & GOUACHE PAINTS & PALETTES

For watercolour I love the paints from Winsor & Newton and Daniel Smith and tend to use only the professional artist quality paints. They cost quite a lot more than the Winsor & Newton Cotman range but the pigment is so much richer (which means I don’t need as much pigment) and the paint goes on smoother. That said, if you’re just starting out or don’t want to splurge the Cotman series is a wonderful more budget friendly alternative. For gouache I pretty much only use Winsor & Newton Designer Gouache.

With paints you can either buy them as tubes or pans. When I started out with watercolours I got a palette with pans from Winsor & Newton and it was an excellent starting point. You get a palette with colours to get started straight away and they’re very easy to transport. If you like to paint quite small I find these work well with a small brush and I still like to use these when I travel.

But my absolute favourite way to work is to buy paints in tubes and create my own palettes. I simply fill the empty pans with the colours of my choice from the tube and then let them sit to dry over night. I find drying them this way before using them by re-wetting them helps me control the amount of paint I pick up with my brush. For my looser florals I love using large brushes and want lots of space for mixing colours. I love using my John Pike palette for these. For my more detailed botanical paintings I have a smaller palette. I love this method so much I have done the same with a palette of gouache.

Paints (tubes & Pans)

Winsor & Newton Professional Watercolour Paint

Winsor & Newton Cotman Watercolour

Daniel Smith Watercolour Paints

Winsor & Newton Designers Gouache

Palettes

John Pike Watercolour Palette (my large palette)

Mijello Palette (my smaller palette)

Winsor & Newton Professional Quality 24 Half Pan Set

Winsor & Newton Cotman 14 Half Pan Set

BRUSHES & PENCILS FOR SKETCHING

For brushes I think a couple of round brushes should be part of your essential kit. Then I like to add a couple of different styles that I can use for different types of mark making in my paintings. I like using the Pro Arte Renaissance Sable brushes in smaller sizes (from 3/0 to about 6) for more detailed paintings. For my looser paintings I have a range or larger brushes ranging from synthetic alternatives to a beautiful Da Vinci quill mop style brush. In general smaller brushes tend to be easier to control but I love the larger ones for looser styles. For me these are so much about trying some different ones and finding what you enjoy using. I’m linking some of my favourites below.

Round brushes (a great set of sizes for more detailed or smaller paintings)

Pro Arte: Renaissance Sable Watercolour Brush Size 3/0 (for the teeniest of details)

Pro Arte: Renaissance Sable Watercolour Brush Size 0

Pro Arte: Renaissance Sable Watercolour Brush Size 2

Pro Arte: Renaissance Sable Watercolour Brush Size 4

Pro Arte: Renaissance Sable Watercolour Brush Size 6

Larger brushes for loose florals

Pro Arte: Prolene Plus Size 10

Princeton Neptune: Oval Wash Size 1/2 in

Princeton Neptune: Oval Wash Size 3/4 in

Da Vinci: Petit Gris Pur Size 4 (mop style brush)

My favourite pencils and fountain pen

For drawing and sketching I have a lovely fountain pen with carbon ink that you can add refills to. I just love drawing with ink, there’s something about not being able to erase it that I really enjoy. And for my loose paintings I rarely sketch onto the watercolour paper. But for my more detailed paintings I do a very faint sketch with a graphite pencil. You want to make sure it’s super light so you can erase the lines after your painting is dry.

Platinum Carbon Drawing and Drafting Fountain Pen

Faber Castell F (my favourite for faint drawing onto watercolour paper)

Muji Mechanical Pencil

WATERCOLOUR PAPER & SKETCHBOOKS

I love painting on loose sheets of paper rather than watercolour blocks and my favourite brand is Fabriano Artistico. I like the texture of the not press for loose florals where I use more water and the hot press for more detailed paintings.

For loose floral sketches I use a sketchbook from Seawhite of Brighton that is 140 gsm. If you use a lot of water with your watercolours it’s probably worth getting a sketchbook with watercolour paper. But for me this is perfect for loose sketches using gouache. And since it’s just a sketchbook I don’t mind if the paper buckles a bit or it isn’t perfect.

Fabriano Artistico, not press

Fabriano Artistico, hot press

Seawhite of Brighton Sketchbook


I hope that is helpful and not too overwhelming. I use quite a few different materials and wanted to make sure to include options depending on what type of painting you want to do and how much you want to spend on materials. Let me know if you have any questions.

Pin for later

 
mathilda-lundin-art-supplies-for-floral-painting-pinterest.jpg
 

Related posts

Elegant spring wedding in peach & cornflower blue
bespoke_calligraphy_wedding_invitation_suite_vow_book_handmade_paper_silk_ribbon_wax_seal_2.jpg

As the first signs of spring is here I want to share this beautiful English countryside wedding inspiration. It’s perfect for couples that are looking for that rustic luxurious look and have a soft spot for pops of colour. The peach and cornflower blue colour theme works so well for spring.

Planned by the lovely Kimberley Rose Designs and beautifully photographed by Yll Weddings I was so excited to be part of a great team of suppliers to make this styled shoot come to life.

I created the wedding stationery suite with a mix of elegant handwritten calligraphy and typography in a gently flowing layout. Giving it an elegant and timeless, yet not too formal feeling for this luxurious barn wedding inspiration. The texture of the handmade paper with its deckled edges fit perfectly with the rustic barn and everything was finished off with endlessly romantic hand dyed peach silk ribbons by Nettle & Silk, and a copper wax seal. Pops of blue were sprinkled throughout the stationery and on the day details, tying it together beautifully with the floral designs and styling on the day.

THE FABULOUS TEAM WHO MADE THIS SHOOT REALITY:

Photographer YLL WEDDINGS | Planning & Design KIMBERLEY ROSE DESIGNS | Floral Design CABBAGE WHITE FLOWERS | Venue CHIDDINGLYE – PATRICK’S BARN | Bridalwear OUI MADAM | Cake CAKES AND LEAVES | Stationery MATHILDA LUNDIN CALLIGRAPHY | Hair & Makeup JO ELIZABETH | Models NATALIE HOBKIRK & OLIVER SPEDDING | Hair Accessory PS WITH LOVE | Groomswear KEYE LONDON | Ribbons & Napkins NETTLE & SILK | Crockery & Cutlery CO-ORDINATION CATERING HIRE | Grazing Station THE GARDEN CHEF | Rings THE LONDON VICTORIAN RING CO. | Ring Boxes THE MRS BOX


I’m delighted to say our editorial has been featured on Whimsical Wonderland Weddings, so head over here to see more photos from the shoot.


Pin for later

 
elegant_spring_wedding_peach_cornflower_blue.jpg
 

Related posts

Modern wedding elegance at the Charterhouse in London

I'm so excited to share some of the photos from this gorgeous shoot at The Charterhouse. A brilliant team of wedding creatives came together to create an effortlessly elegant editorial at this wedding venue in the heart of London.

A beautiful wedding venue in the heart of London with lots of history.

A beautiful wedding venue in the heart of London with lots of history.

The cloister is perfect for a romantic candlelit wedding ceremony.

The cloister is perfect for a romantic candlelit wedding ceremony.

The stunning Norfolk Cloister was the perfect setting for our elegant candle lit ceremony and reception, with its original doorways dating back to 1371. The leafy floral designs from Leigh Chappell Flowers filled with white blooms added a beautifully romantic touch to the space.

Gorgeous accessories from PS With Love’s complimented the petal details in the wedding dress design.

Gorgeous accessories from PS With Love’s complimented the petal details in the wedding dress design.

Leigh filled the beautiful bouquet with white blooms and leafy foliage for a beautiful sense of movement.

Leigh filled the beautiful bouquet with white blooms and leafy foliage for a beautiful sense of movement.

I wanted the invitation suite to allude to the play between the modern wedding details and designs and the history of the venue. Working with the contrast of modern set typography and organic fluid calligraphy, creating a modern sophisticated invitation suite. The design is offset with plenty of white space for a modern editorial feeling. Adding interest and texture with crisp white paper and a botanical vellum wrap which was created with a traditional pointed nib. Golden highlights were added to both the wedding suite and menu to tie the design together with the golden details in the styling.

I mixed a modern editorial layout with calligraphy created with a traditional ink and nib for a sophisticated design. Introducing a vellum sheet detail and gold touch for a modern elegant feeling.

I mixed a modern editorial layout with calligraphy created with a traditional ink and nib for a sophisticated design. Introducing a vellum sheet detail and gold touch for a modern elegant feeling.

For the tablescape I drew an elegant botanical runner by hand in gold ink. Bringing in the textures of the seasonal foliage and gold accents throughout the styling. The menu was printed on crisp vellum, adding a beautiful contrast to the hand dyed linen napkins by The Natural Dye Works.

The botanical runner featured hand drawn botanical and foliage details, tying it together with the elegant floral designs.

The botanical runner featured hand drawn botanical and foliage details, tying it together with the elegant floral designs.

A modern romantic setting with brass candleholders from Workshop and tableware from Classic Crockery.

A modern romantic setting with brass candleholders from Workshop and tableware from Classic Crockery.

The semi sheer vellum adds a crisp modern feeling to the wedding menus.

The semi sheer vellum adds a crisp modern feeling to the wedding menus.

I designed a ceremony banner filled with fluid calligraphy, acting as an organic soft backdrop to the elegant couple and clean lines of the bride’s dress. And oh how gorgeous that duchess satin A-line dress with a deep V-neckline front and back dress from Jesus Peiro is.

The flowing calligraphy in the banner acted as a beautiful backdrop to the clean lines of the dress.

The flowing calligraphy in the banner acted as a beautiful backdrop to the clean lines of the dress.

The words came from one of Andri’s real ceremony scripts.

The words came from one of Andri’s real ceremony scripts.

The banner was used again as a backdrop to the gorgeous wedding cakes by Vaani of Sugar Plum Bakes. She created a trio of lemon buttercream cakes. Each in a different finish to complement the rest of the shoot. It was great working so collaboratively with Vaani, exchanging ideas and seeing it all come together at the day. With Vaani’s hand drawn botanical pattern working beautifully with the foliage and illustrations in the wedding suite and botanical runner. And the gold stud finishes as a subtle nod to the wedding menu detail.

The banner also acted as a backdrop for the gorgeous cake display.

The banner also acted as a backdrop for the gorgeous cake display.

Beautifully textured buttercream with elegant touches of gold.

Beautifully textured buttercream with elegant touches of gold.

Everything was perfectly captured in Maja Tsolo’s timeless photography style. Videographer Handcraft Pictures captured the atmosphere on the day and put together the gorgeous cinematic highlights video below.

CharterHouse-historic-londong-wedding-venue-jesus-peiro-dress-5.jpg
CharterHouse-historic-londong-wedding-venue-jesus-peiro-dress-6.jpg

The fabulous team I was lucky to collaborate with on this shoot. Do take a look at their websites:

Photography – Maja Tsolo Photography | Videography – HandCraft Pictures | Planning + Design – Always Andri | Venue – The Charterhouse London | Bridalwear – Jesus Peiro via Miss Bush Bridal  | Florist – Leigh Chappell Flowers | Makeup Artist – Louise Lerego | Hair Stylist – Chevuex Cimone | Stationery + Calligraphy – Mathilda Lundin Calligraphy | Cake Designer – Sugar Plum Bakes | Hair Accessories + Earrings – PS With Love | Wedding Rings – Nikki Stark Jewellery | Tableware + Chairs – Classic Crockery| Silk Ribbons + Napkins – The Natural Dyeworks | Brass candleholders + Brass Ring – Workshop | Shoot Assistant – White Boheme Weddings | Models – Chloe Alishia and William Peters

I’m delighted to say our editorial has been featured on Love My Dress, so head over here to see more photos from the shoot.

PIN FOR LATER


Related posts

Romantic wedding day menus and place cards on handmade paper for an English Garden bridal editorial

The gorgeous blossoms that are surrounding us this time of year made me reminisce over my first wedding feature. I was lucky enough to work with a group of wonderfully talented ladies on a Secret English Garden themed shoot. Indulging in the beauty of locally sourced home-grown English flowers and lush greenery and set in a stunning glasshouse. This is the perfect inspiration for couples looking for an endlessly romantic more intimate relaxed setting, surrounded by nature and with a bit of added luxe through touches of gold.

The florals were brought in as a centrepiece, surrounded by thoughtfully designed stationery, wedding favour biscuits and botanically dyed linen.

The florals were brought in as a centrepiece, surrounded by thoughtfully designed stationery, wedding favour biscuits and botanically dyed linen.

A dreamlike glasshouse in a Secret Garden provides the perfect setting for an intimate wedding party surrounded by lush foliage.

A dreamlike glasshouse in a Secret Garden provides the perfect setting for an intimate wedding party surrounded by lush foliage.

Most of the flowers and foliage was sourced from Sarah’s own garden and British flower farms. Together she and Leigh designed the most beautiful lush floral designs. Mixing green foliage with lilac, mauve and deep purple florals which worked perfectly with the gentle tones and textures throughout the styling.

Romantic wedding menu and place card on handmade paper with deckled edges.

Romantic wedding menu and place card on handmade paper with deckled edges.

An endlessly romantic intimate setting. Perfect inspiration for a garden wedding.

An endlessly romantic intimate setting. Perfect inspiration for a garden wedding.

The romantic table setting was styled by Amy, The Timeless Stylist, using vintage cutlery and gold-rimmed plates from her heirloom collection. Adding gold details for a touch of luxury.

For the stationery I used handmade paper with gently textured edges to compliment the textures of the styling and the botanically dyed napkins from Ros. I drew botanical details by hand to bring in the lush garden inspiration into the wedding paper. As a finishing touch I added touches of gold leaf which tied in perfectly with the gold leaf details on the wedding cake, created by Vaani.

Utterly stunning romantic wedding cake details including speckles of gold leaf and edible pearls.

Utterly stunning romantic wedding cake details including speckles of gold leaf and edible pearls.

A stunning buttercream wedding cake brimming with English florals and luxurious details.

A stunning buttercream wedding cake brimming with English florals and luxurious details.

Vaani designed two sumptuous wedding cakes. The first was brimming with British florals and luxurious gold leaf touches, macaroons and chocolate truffles. The second was decorated with textured buttercream and brushed with rose gold with edible lace finishing off the design. Vaani also designed and created the beautifully detailed wedding cookies for the table setting design.

Behind the scenes of the wedding stationery, before it was beautifully laid out by Amy.

Behind the scenes of the wedding stationery, before it was beautifully laid out by Amy.

Gorgeous florals and the second beautifully artistic wedding cake design.

Gorgeous florals and the second beautifully artistic wedding cake design.

Everything was beautifully captured by Maja and there’s still so many gorgeous details to explore from this shoot. Pop over to her website to see more and don’t miss the link to the editorial at the end of this post. Do you have a favourite part of inspiration from this editorial? Are you dreaming of a more intimate relaxed setting like this or a big wedding with all of your friends? Let me know if the comments.

The gorgeous table setting. Styled by Amy with that lush floral design by Leigh and Sarah.

The gorgeous table setting. Styled by Amy with that lush floral design by Leigh and Sarah.

I used a slightly more bohemian but luxurious calligraphy style to fit the mood of the editorial.

I used a slightly more bohemian but luxurious calligraphy style to fit the mood of the editorial.

The team of wedding creatives that made this beautiful editoral come together:

Maja Tsolo Photography | Nettlewood Flowers | Leigh Chappell Flowers | The Timeless Stylist | Sugar Plum Bakes, Cake Designer | The Natural Dyeworks | Louise Lerego, Make-up Artist  | Mathilda Lundin Calligraphy

If you want to see our Secret English Garden editorial you can find it over on Rock My Wedding.


Pin for later

intimate-english-garden-wedding-inspiration-editorial-pinterest.jpg
 

Related posts

How to design your own elegant Christmas gift wrapping with calligraphy

As Christmas is drawing closer I find myself thinking more and more about what to give to my loved ones, and the gift wrapping that comes with it. My grandma would always use the most beautiful old wrapping paper that she collected, and every year I would take my time opening the gift from her with thought and care. Because it’s just something about beautiful gift wrapping that makes the act of giving feel even more special to me.

Now, I don’t have any beautiful vintage paper lying around so I decided to make my own Christmas gift wrapping by adding calligraphy details to, well, everything. I added big and expressive calligraphy on brown wrapping paper, gold lettering to the ribbons and finished off my gift wrapping with round gift tags with festive metallic ink. And I captured it all in this tutorial if you want to create your own calligraphy Christmas gift wrapping.

 
luxury-calligraphy-gift-wrapping-4.jpg
calligraphy-christmas-wrapping-paper-gift-tags.jpg
 

Tools

  • Thick paper stock in a beautiful colour for your gift tags

  • Brown kraft paper

  • Wider ribbon for you to write your calligraphy on

  • Thin satin ribbon to attach your gift tag

  • Your choice of calligraphy nib and pen holder

  • Metallic ink. I used Moon Gold from the Finetec Pearl Metallic inks palette (one of my favourites) which I have written a guide for how to use here.

  • Metallic and/or white paint markers to write on your ribbon and kraft paper (I love the Sakura Pen-touch metallics and the white Molotow acrylic marker)

  • Scissor

  • A hole punching tool

 
calligraphy-christmas-wrapping-paper-tools-2.jpg
calligraphy-christmas-wrapping-paper-2.jpg
 

The wrapping paper

If you want to this really neatly I would encourage you to measure out a large enough piece of the kraft paper to cover your gift, draw faint lines with a ruler and do the monoline calligraphy with your paint marker. I decided to be a bit more loose and expressive, looking at the overall effect rather than each individual word and line. So I simply rolled out a piece paper and went for it. Go for what suits the style of your lettering best and what you feel the most comfortable with.

 
calligraphy-christmas-wrapping-paper-5.jpg
calligraphy-christmas-wrapping-paper.jpg
 

The ribbon

Try to weigh down one end of your ribbon by placing a heavy object on it, keep the ribbon in place with your other hand. This should help you to write smoother on it.

 
calligraphy-christmas-wrapping-ribbon.jpg
luxury-calligraphy-gift-tags-2.jpg
 

The gift tags

Start by drawing a faint guide for your tags, then cut them out and punch a small hole where the ribbon will go. Write your message beautifully with your calligraphy tools and metallic ink. Finish your tags off with a thin satin ribbon in a colour of your choice.

 
luxury-calligraphy-gift-tags-3.jpg
luxury-calligraphy-gift-tags.jpg
 

I hope you’ve found this tutorial inspiring and that you give personalising your gift wrapping a go. Let me know in the comments if you do or if you have any tips on how to get creative with your gift wrapping.

Mathilda x


Pin for later

 
elegant calligraphy christmas gift wrapping
 

Related posts

How choosing the right suppliers can make your wedding planning less stressful and more enjoyable

Oh wedding planning. On the one hand it’s one of the most wonderful things because you’re planning what will hopefully be one of the most magical days of your life. On the other hand it can be very daunting and stressful because, well, you’re planning what will hopefully be one of the most magical days of your life.

As a calligrapher I love obsessing over the details to make my client’s dream wedding stationery come true. As a bride to be I quickly felt overwhelmed by all the decisions that had to be made.

So how did I plan our dream wedding while keeping calm and enjoying the process? I shifted my decision making from each tiny detail to which suppliers I trusted would blow me away with their work. Read on for my tips on how to choose your suppliers and where to find them. Interspersed with photos from our big day, captured by the wonderful Gina Dover-Jaques.

 
Make wedding planning less stressful with the right wedding suppliers
 
 
My beautiful bouquet from Grace & Thorn.

My beautiful bouquet from Grace & Thorn.

The magic of choosing the right suppliers

As a calligrapher I’m lucky enough to get to be part of making my clients’ wedding stationery dreams come true. It’s one of my favourite parts of my job. But I have the luxury of being able to obsess over the details I add to the day, because it’s a small part of it. When you choose the right suppliers they can each focus on making the thing they’re best at absolutely perfect for your big day. Meaning you can let go of the stress of making each individual decision. And get more time for the enjoyable bits, like seeing your dream stationery come alive or testing the food for your reception (easily one of my highlights from wedding planning). In the words of one of my lovely brides to be:


“From start to finish, Mathilda was involved in every step of the process, listening to my ideas and giving suggestions of her own. Mathilda was patient in the entire development of my wedding invitations and together we came up with the perfect end-product. She provided visual aids, added custom personalizations, and made the whole design process so enjoyable and easy! Finally seeing the invitations in person, which were carefully wrapped and shipped to the US, was the most exciting part of my wedding planning process so far and I can’t wait to continue working with her on the remaining paper products for the wedding!”

– Erika, Bride to be


What I want you to take with you from that testimonial is how the process was made enjoyable and easy. How seeing her wedding invitations in person was the most exciting part of her wedding planning so far. For me, being allowed the privilege of supplying wedding stationery and calligraphy details is not just about designing something pretty. It’s about taking some things off my couple’s to-do list and making the process enjoyable and exciting for them. That’s what I was looking for when choosing my suppliers and that’s what I would encourage you to do to make your journey to your wedding as wonderful as possible.

 
Love this white ink on grey envelopes.

Love this white ink on grey envelopes.


I’m in love with Dulwich Picture Gallery.

I’m in love with Dulwich Picture Gallery.

Things to consider when choosing your suppliers

This is going to depend on what is important to you. So sit down with a cup of tea (or pour yourself a glass of nice red wine) and a notebook and think about what you want to get out of your suppliers. For me I wanted suppliers whose aesthetic I liked with lovely personalities. People I felt like I was able to reach out to and ask questions along the way.

As an example one of the things I was the most worried about was photography.  I wanted stunning photos but I am incredibly awkward in front of the camera. We decided on Gina Dover-Jaques who I already knew from Instagram. She had photographed some of my wedding stationery so I knew her fine art style was exactly what I wanted but also that she is just this amazing person. She made the photography one of the most memorable part of our day and we have the most beautiful (not awkward in the least) photos from our wedding.

 
Make wedding planning less stressful with the right wedding suppliers
 
Romantic wedding in an art gallery
 

Where to find your suppliers

When I was looking for suppliers I wanted to get a feel for their aesthetic and personality. Some areas I suggest you use in your search are:

  • Inspiration wedding websites like Rock My Wedding.
    I adore the RMW aesthetic and spent quite a bit of time here, both getting inspired by their real wedding stories and looking at their list of recommended suppliers.

  • Instagram.
    I love when you can get a bit of a feel for a supplier’s personality and I find Instagram helpful for this.

  • Through your other suppliers.
    Working in the industry a lot of us have people we adore working with and are happy to recommend. As well as all the stunning inspiration that is on there.

  • Friends and family.
    Was there something about a friend’s wedding you loved extra much? Ask who helped them create it.

  • Your local area.
    Have a wander in your area. Maybe your favourite local florist can help you with flowers? Our wedding venue was Dulwich Picture Gallery. A stunning gallery we frequently visit that we knew was meaningful to us and would make the day extra special. Our reception venue was our local hotel/pub. It’s a gorgeous space and we love the food so we just popped in to ask if they do weddings. They never had but were happy to do it for us and we were blown away by the people working there. Absolutely magical from early planning to testing our own wedding cocktails to the actual day.

 
Tulse Hill Hotel serves the most amazing food.

Tulse Hill Hotel serves the most amazing food.

 
I calligraphed the menu items on tiles.

I calligraphed the menu items on tiles.


That’s it, I hope this will help you in your path towards your dream wedding. Planning definitely has its’ stressful moments but oh gosh, our wedding day was so much more filled with love and joy than I could have ever imagined. Both because of our wonderful friends and family, but also because of the love and dedication our suppliers put into all the details.

Do you have any tips for making wedding planning a breeze? How did you find your wedding suppliers? How did you know which to choose for your big day? I’d love to hear what has worked for you!

Are you interested in how I can help make the path towards your dream wedding stationery more enjoyable and exciting?


Pin for later

Make wedding planning less stressful with the right wedding suppliers
 

Related posts

How to use the Finetec palette for pointed nib calligraphy

 If you're into Modern Calligraphy, and have been looking for something to give your work that extra sparkle, you've probably come across the stunning metallic palettes by Finetec (sometimes knows as the new name Coliro). They have a beautiful range of colours ranging from gold to silver to beautiful rose metallics. With their ingredients of gum arabic and mica-pigments they come out beautifully opaque on both light and dark surfaces. 

But here's the thing that might seem tricky at first sight. They're neatly packaged in little palettes, that looks more like watercolours than a ready to use ink. How do you get the ink from the palette onto your nib without dipping it? Don't worry, it's a bit more of a process than a ready to use ink. But the results are absolutely stunning and well worth the extra effort.
 

Here's what you'll need

  • Finetec colour of your choice

  • Your favourite nib and penholder

  • A small brush

  • A jar of water

  • Some paper to write on

 
mathilda-lundin-finetec-palette-calligraphy-tutorial-tools.jpg
 

First you add some water to the pigment, let it sit for a couple of seconds or so to let it soften up a bit. After that you want to start to gently mix the water with the pigment. You're looking for a milky consistency (on the top layer, the pigment below is still solid). I usually go between my water jar and the palette a few times. If the ink isn't flowing smoothly I add more water. If I end up with a too watery consistency I just let it sit for a while and let the pigment go back to a more solid state. So experiment and see what consistency works for you. 

When you're happy with your ink mix you load up your brush and gently paint on the ink on the underside of your nib. Make sure to fill up the reservoir by looking at when the hole is completely covered with ink. And that's it, you're ready to do some sparkling beautiful calligraphy!

Hope you found this tutorial helpful and please feel free to share it with anyone you think might find it interesting and inspiring.

Experiment, have fun and write something beautiful! And please tag me on Instagram (@mathildalundin) to show me what you've created xx

Pin for later

 
mathilda-lundin-finetec-moon-gold-pointed-pen-calligraphy-tutorial.jpg
 

Related posts

Festive place cards with wax seals and ribbons


One of my favourite things about this festive time of year is all the excuses it provides for us to make beautifully calligraphed gift tags and place cards. I'm currently obsessed with my new wax seal from Stamptitude (also, how can you not love that name?) and black wax from Granit. So I decided to use them to create some place cards for New Years. Including one for our little kitten as well of course. Does this officially make me a crazy kitten mama? The little ribbon makes them perfect to add around each guests napkin at the table. 

So let's get to how to make these! 


You will need

  • Thick paper

  • Wax seal

  • Wax

  • Ribbon

  • Something to write with (I used a Nikko G nib with an oblique penholder and sumi ink)

Plus optional sweet treats. I say optional but I’m pretty sure it’s scientifically proven to help with your crafts. I chose mince pies purely because they’re pretty. 

 
christmas-placecard-1.jpg

Step 1

Melt your wax.

christmas-placecard-2.jpg

Step 2

Attach the ribbon to the paper with your wax and stamp it with a pretty design.

christmas-placecard-3.jpg

Step 3

Write the name or message on your tag.

christmas-placecard-4.jpg

Step 4

Make someone happy (Alex enjoyed his more than Freja did). Relax and enjoy your well deserved treat.

Hope all of you have a lovely New Years Eve! 


Related posts